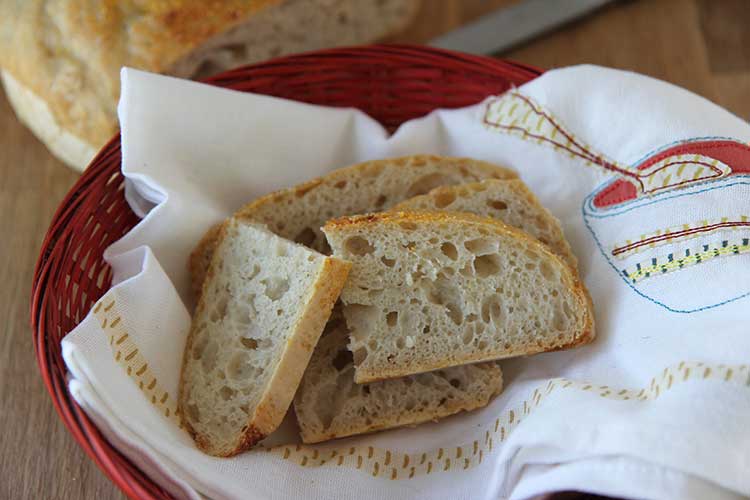
How To Make Bread – Amazing No-knead Bread Recipe!
I am inherently lazy. I have always been that way. I love doing stuff, don’t get me wrong, and I love doing stuff that turns out well and I then can take pride in my work and stuff. But, dangit, doing stuff is hard work! Stuff like making a kickin’ loaf of homemade bread, for example.
I used to bust my stupid hump measuring exactly and kneading dough and sitting by the clock to make sure I didn’t over-rise it, and then still end up with a mediocre loaf of bread that I would not want to share with Martha Stewart, even if she was still in jail and ready to shiv a bitch for some homemade bread. It was so disappointing.
Then I came across this recipe in the New York Times online. It was the answer to my mumbly, half-assed prayers. Perfect every time. Easy as hell. What more could I ask for? Oh, I know. A Martha Stewart brand shiv made from a pork chop bone.
How to Make Bread Video – No-knead Bread Recipe
No-Knead Bread Recipe
PrintNo-Knead Bread
So simple, all you need is time!
Ingredients
- 3 cups flour (all purpose or bread flour; white or whole wheat; a combination of any of the above)
- 1 1/2 teaspoons salt
- 1/4 teaspoon dry yeast
- 1 5/8 cups water
- Cornmeal
Instructions
- Combine flour, yeast and salt in a large bowl. Add water and mix it up. It’s really wet-looking. That’s fine. Cover it with plastic wrap or a towel and set it aside for 12-18 hours. Go do something else and forget about it.
- Come back 20 hours later (it’s okay) and look at it. It’s all wet and bubbly like the La Brea tar pits, right? Right. Punch it!
- Dump it onto a lightly floured surface like a countertop.
- Fold it over twice.
- Put onto a plate sprinkled with cornmeal.
- Cover it and let it rise two more hours. Go watch a movie. I suggest Throw Momma from the Train. It’s only 88 minutes long.
- When it’s over, turn your oven on to 450 degrees Fahrenheit.
- Put a heavy pot (that has an oven-proof lid) in the oven to heat up as well. I’ve used ceramic and cast iron with great results.
- When your oven is preheated, take the pot out (use oven mitts!), dump in your dough, put the lid on it and stick it in the oven for 30 minutes. Go take a shower.
- Take the lid off the bread and cook another 15 minutes (although I have left it in there for the better part of an hour and it’s been fine but for a little more brown).
- Pull that bread out and it should release easily from the pan onto a cutting board.
- Let it rest 10-15 minutes for best slicing results, or just tear off a hunk like a rabid animal and stick it in your mouth. Psych! Just kidding! It’s really hot!!!
39 Comments
Leave a Comment


Please disregard. I am testing Facebook Connect for comments.
I’ve ignored this for over 6 years. I can’t take it any longer.
Straight off good! Watched the video first, a sweet five minutes of instructions and tips. Live in Italy and have access to great bread, but needed something for USA visits sorta similar, this is it! Made two loaves, perfect bread! Thank you Hilah Cooking
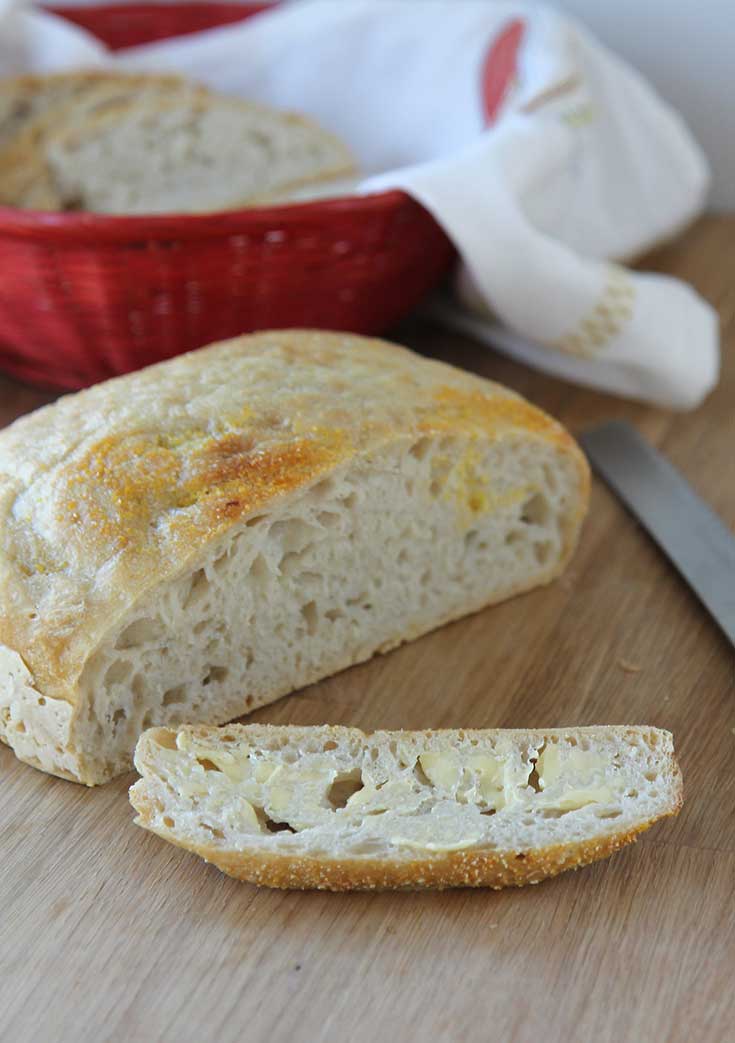
I remember reading about this recipe a while ago and being intrigued but I have such a disastrous bread-making history that its been hard to get motivated. Your yummy bread with all its airy bubbles has changed that! Now I can't wait to try it! Thanks!
Oh goody! Try it! Let me know how it goes. I have never had this recipe fail.
I'm not much of a baker, but really want to try this using whole wheat pastry flour (very finely ground whole wheat flour).
That should work great, Scott! I’ve also used part rye flour with good results, but a little denser than wheat.
what can be better than devouring bread freshly and still warm….yummmmy
I particularly like the part about acting like a rabid animal…
all the best!!
Dennis
Thanks, Dennis! There is nothing better than fresh bread, that is true.
Awwwwwwwwwwww you’re such a cutie – what a great video! I’m going to try your recipe tomorrow – I’ve made focaccia before but I haven’t tried regular bread yet – it’s definitely time!!
Thanks, Sandra! This is a great first-timer recipe. Let me know how it turns out!
Wow, this makes so much more sense than fighting with bread the old fashioned way. I am going to attempt to do this with gluten-free flour this weekend and I will report back; hopefully it works!
Oh yes! Please let me know, I’ve had several people ask me and I’ve never tried it with all gluten free flour. Hope it works!
Yes, it does work! It needs a bit of tweaking from the original recipe to work as easily and beautifully as with gluten-flour, but it does work and not having to even attempt to knead the dough is WONDERFUL with gluten-free flour. That stuff is a sticky mess, even at the best of times!
Here’s my write-up with photos: http://dysfunctionalkitchen.blogspot.com/2010/05/bread-experiment-in-progress.html
The biggest change I would make is to cook it longer at a lower temperature, because the dough is SO DENSE (which is normal for gluten-free bread dough). The other change is that I really need to get myself a cast iron dutch oven! The glass dish I used was great for photographs, but the bread stuck to the inside and we had to pry it loose.
Otherwise I would absolutely give this a go for gluten-free cooking.
Thanks for reporting back, Christy! Your loaf looks perfect!
I just tried this recipe and it works! I really had my doubts because the dough was VERY wet and didn’t hold together enough for me to even do the brief kneading. And during the second rise it oozed all over my countertops.
But it just came out of the oven 20 minutes ago and it looked FANTASTIC. And now that I’ve just had a slice–OMG!!!!!
This is TRULY the easiest bread recipe ever.
Yeah, I was skeptical the first time I tried it but it works every time!
Hey Hilah,
I was really psyched to try this recipe out (mainly cause i have a lot of plain flour lying around – long story), and reading all those wonderful success stories i honestly thought it would work but I was not too successful..
My bread looks amazing on the outside perfect brown crust and tastes like bread as well, but it is not springy, it turned out dense inside. No air pockets it looks like it did not cook properly from the inside. any suggestions? any tweaking that would need to be done?
Hi Divya! That is a sad story! I’m sorry it didn’t work. It sounds like your yeast was dead. Try it again with some fresh yeast and check the date on the package before you buy it. If you don’t want to toss the sad loaf, you could still use it to make breadcrumbs with a food processor. Thanks for writing and please let me know how the next round goes!
-h
I just finished making this and I kicked its ass. The only thing I did different was after uncovering it for the last 15min, I brushed the top with olive oil and a little butter.
also, while it was sitting I dusted the top with various spices I thought would like and then when I did the folds it made some nice spicy streaks in the bread.
http://www.flickr.com/photos/19254021@N00/5515349786/
Hi Mazz! Thanks for the update! Great idea to smear some fat on top – I bet that was real good. What spices did you add?
Hi Hilah!
I just made the most heavenly bread with this recipe! I’ve tried another before but the bread came out dense and the crust was dull and thick; not this time though! I think covering the bread for the first 30 minutes makes all the difference. It’s so good I just gobbled down 2 slices with butter:P
Thanks for the recipe – I’m currently studying for exams in uni and this experiment was an EXCELLENT diversion!
Hi Amelia!
That’s so great! What an excellent distraction from studying. 😉 Thanks for the feedback. I hope you try some more recipes!
so Hilah….I so thought I had really screwed this up all the way into the oven…you are so right!!! I can’t believe what happened here!!!! Yummy, delicious, with amazing texture….I swear, I was ready to throw it out…..but I’m so glad I didn’t!!!!
Ha! It’s really cool how it works, right? Like a total science experiment in the oven. Thanks for writing in, Melanie! Glad it worked for you.
The BEST homemade bread EVER. Most times when we make bread at home it does not go over very well. I stop making it and toss the bread machine.
I made this bread as a chance to redeem all homemade breads. This bread went over amazing. In fact, I was ready to make a gray and bread breakfast with some – it is gone. My family ate the whole loaf in less than 2 hours. This is a must have in our house. Thank you!!
Yay! That makes me SO happy, Cheryl! And reminds me I should make a loaf of this again, too. 🙂 Happy New Year!
Looking forward to trying recipe….could you make rolls from this dough.
Hi Sara!
I haven’t tried making rolls with this, but I think it would be difficult because the dough is so soft you can’t really form it at all. It just turns out the shape of your cooking vessel. I’ll be posting a dinner rolls recipe soon, though!
Just use a cupcake pan and it will be rolls.
Hello Hilah!
Just tripped over your cute video on bread making. You make it look so easy I’ve decided it will be fun to follow your website and try out your recipes. I’ve just forwarded your site to my son’s girlfriend. She is brand new to cooking and baking and I think she will learn a lot from your videos. You make it FUN and not overwhelming.
Tell me, what could I add to your bread recipe in the way of grains or cheese … olives???
Will you be doing a video on how to make whole grain type of bread?
Many thanks,
Louise
Hi, Louise!
Thanks for writing. I’m glad you found me. 🙂
I think grated cheese or olives would both be delicious! Maybe some toasted nuts or seeds mixed into the dough, or just sprinkled on top before baking, too.
I have meant to do a regular, kneaded bread dough for a while and it will probably be whole grain. Thanks again. I read your other comment and got tears in my eyes.
Hugs!
I’ve shy’d from bread making because for some reason I’m intimidated by yeast. But after watching your video (3 times), I’m going to go RIGHT now and start the dough. I hope to have a good loaf tomorrow night. 🙂
Oh that’s so exciting, Denise! Best of luck on your first bread making. Hope you have fun!
I am going to give this a go, but could you please tell me what the equivalent to cornmeal might be. I am in the land of Oz. I cant imagine what else I could use. thanks. x
Good question, Vicki. The purpose of it is to just keep it from sticking so something else coarse would prob work… maybe fine polenta? Or oat bran?
wow I made bread for the first time, its amazing thanks.
I tried this recipe and it has been 14 hours. My dough is not rising? Any thoughts on what I might have done wrong?
Hey Nathan! Did it rise at all? If there were a few bubbles, it could mean that your room temperature is a little cooler than the yeast like. If there were zero bubbles, no action at all, then your yeast was probably dead.